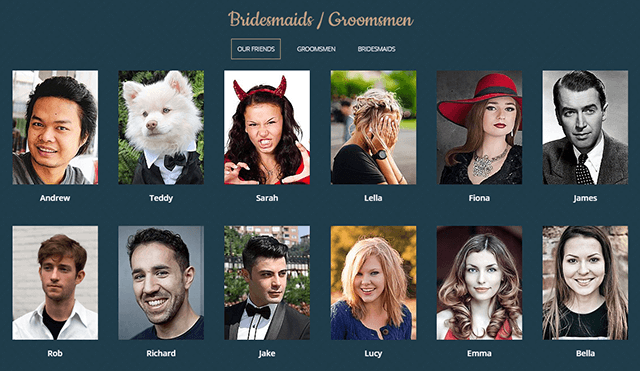
How to create a Gallery filtered grid layout
15 Oct 2017 - Written by Paul Burndred
Posted in How to Joomla
With our busy forum and ticket system we get a fair idea of features members are using, one feature of Zentools2 however we don’t see members making use of yet is the Gallery content source. The Gallery is a super flexible content source with loads of features and in this tutorial we cover one of those features in particular – a filtered grid layout.
The Gallery filtered grid layout is used on the Wedding template and this example is taking from that Joomla 3 theme – you can see this example on the upcoming Wedding template.
Filtered grid layouts
There are many different ways to to create a filtered grid and you can see different examples on the Zentools2 documentation site. This post looks only at using the Gallery content source for the filtered grid.
Before you start
The Gallery source selects image content from folders within the Joomla images folder, however for module performance it can not display image content from sub folders – for images to be available they must be in the first level of the folder structure.
Layout and Source
We want to create a filtered gallery of bridesmaids and groomsmen so we will select Filter for the layout, content source as Gallery and in the item layout we have selected Image and Title to display.
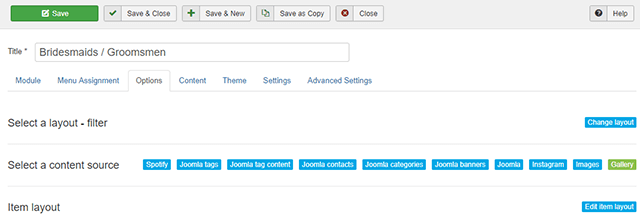
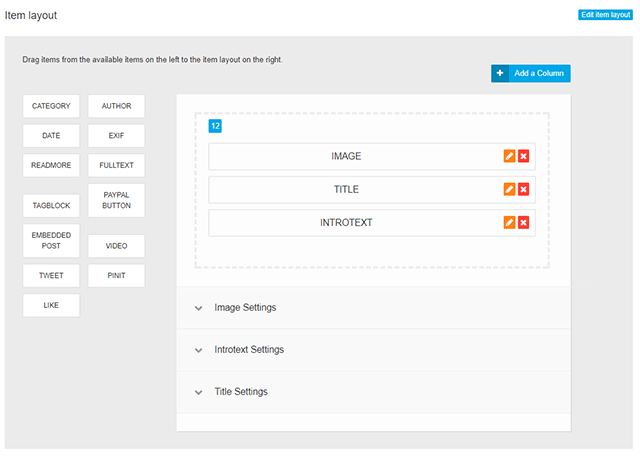
The click behaviour is set to none for this example – so when the image is clicked nothing will happen.
Module Layout
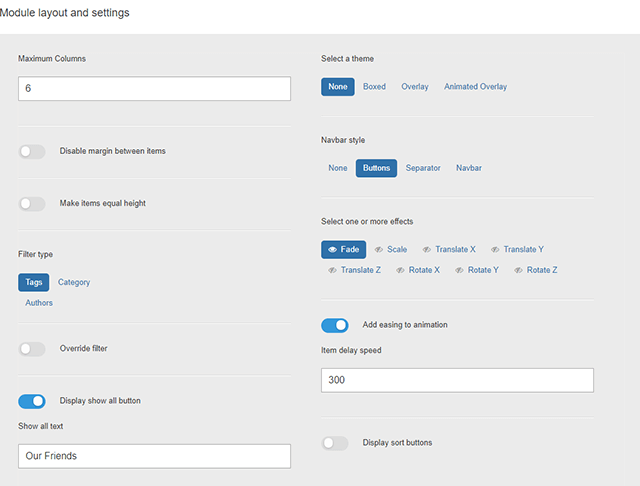
In this section we have the content set to display at 6 columns, set the filter type as tags, enabled the show all filter (show all text changed to "Our friends") and enabled the buttons Navbar style. For more detailed information on Zentools2 settings view the documentation in the Zentools2 demo site.
Content Tab
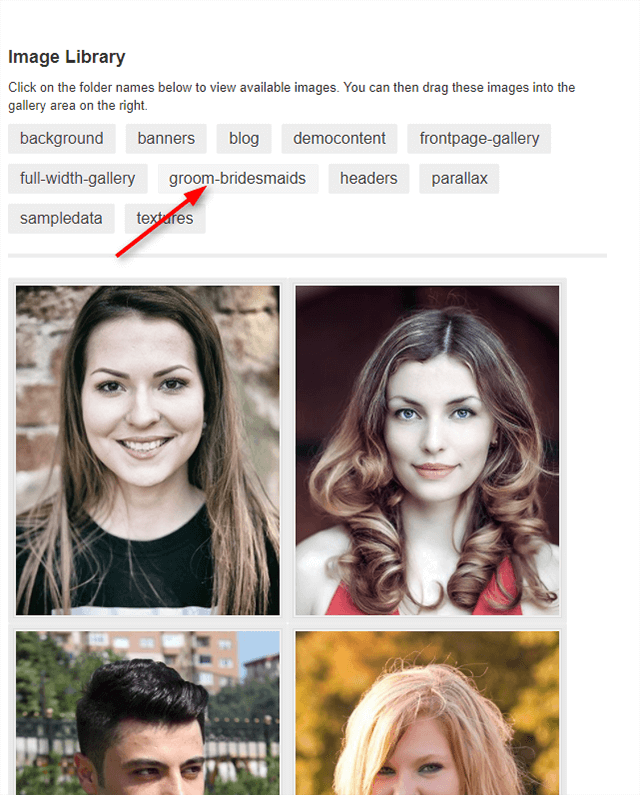
When opening the content tab inside the module, the available image folders will be displayed. Here we have opened the groom / bridesmaid folder and are dropping the images in to the drag images here section.
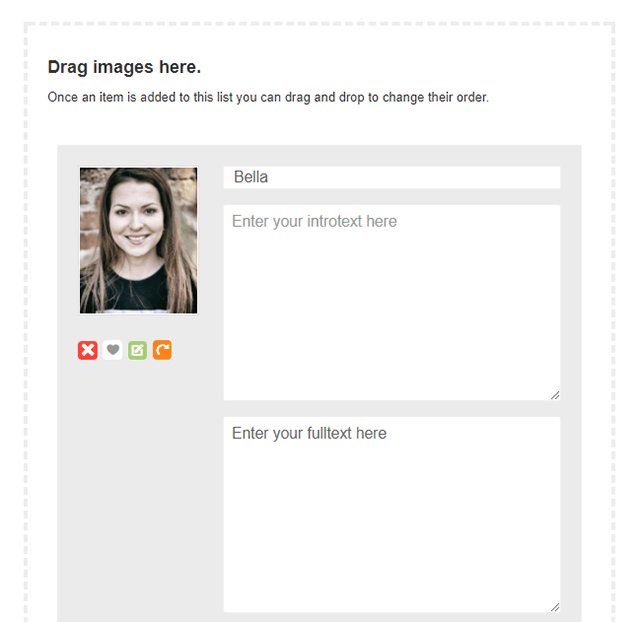
Adding titles to pictures
By clicking the green pencil on the image which opens up the available settings. When adding images it will take the filename as the title by default, so in example above we’ve added new titles.
Adding links to pictures
By default the link field will be populated by the image path, however, if we wanted to create a simple portfolio module we could replace the links with absolute urls, but in this example we are leaving the image path intact.
Changing to a url or removing the image path will not remove the image already added - the image can only be removed by clicking the cross.

Adding Tags
In the tag field we are adding tags for Bridesmaids and Groomsmen to the respective images.
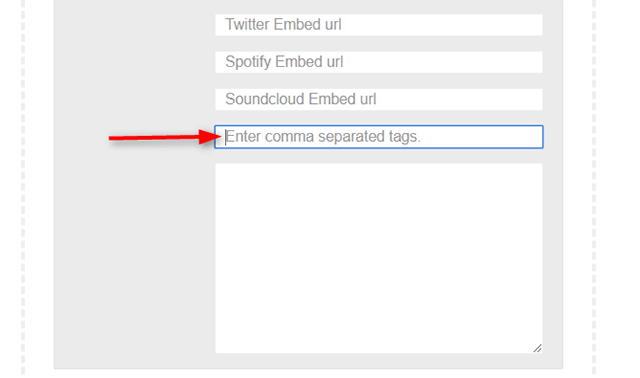
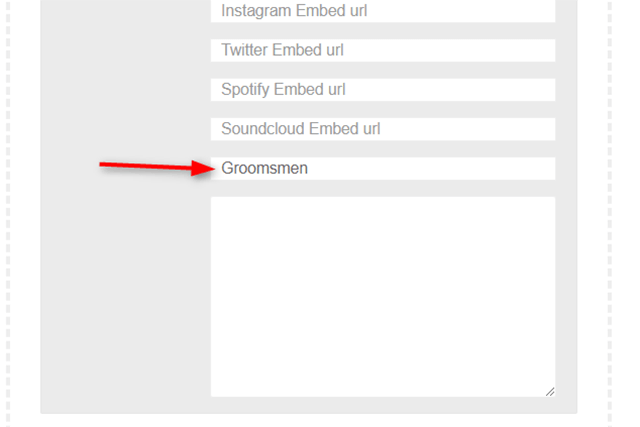
These tags when clicked act as the filters on the front end of the site as shown here.
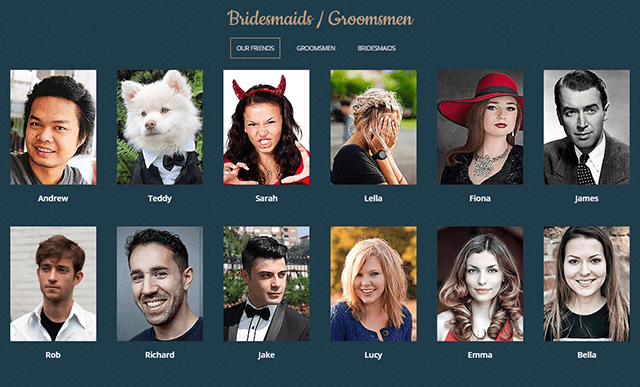
The show all filter (our friends)

Using the bridesmaids tag as filter

Using the Groomsmen tag as filter
Gallery content source
You can find out more information about Zentools2 and the rest of Gallery content source features in the Curated Gallery section of the Zentools2 demo site covering support for Instagram, Twitter, Facebook, Soundcloud, Paypal, Spotify and much more.
Thanks
We will be adding more articles looking at different aspects of the super flexible Zentools2 module. If you have any feedback or questions, please add them below and we will get back to you very soon.
blog comments powered by Disqus
